

A few months ago they decided that's what they wanted to be for Halloween this year. It was a pretty big commission, but they promise to pay it off in candy. Since the cartoon is relatively new, there isn't a lot of commercial reference material (toys, costumes, etc.) so I took pictures along the way so other people could get ideas and help making their Finn and Jake costumes too. Here's Sage as Finn:.

Here's how to make it:
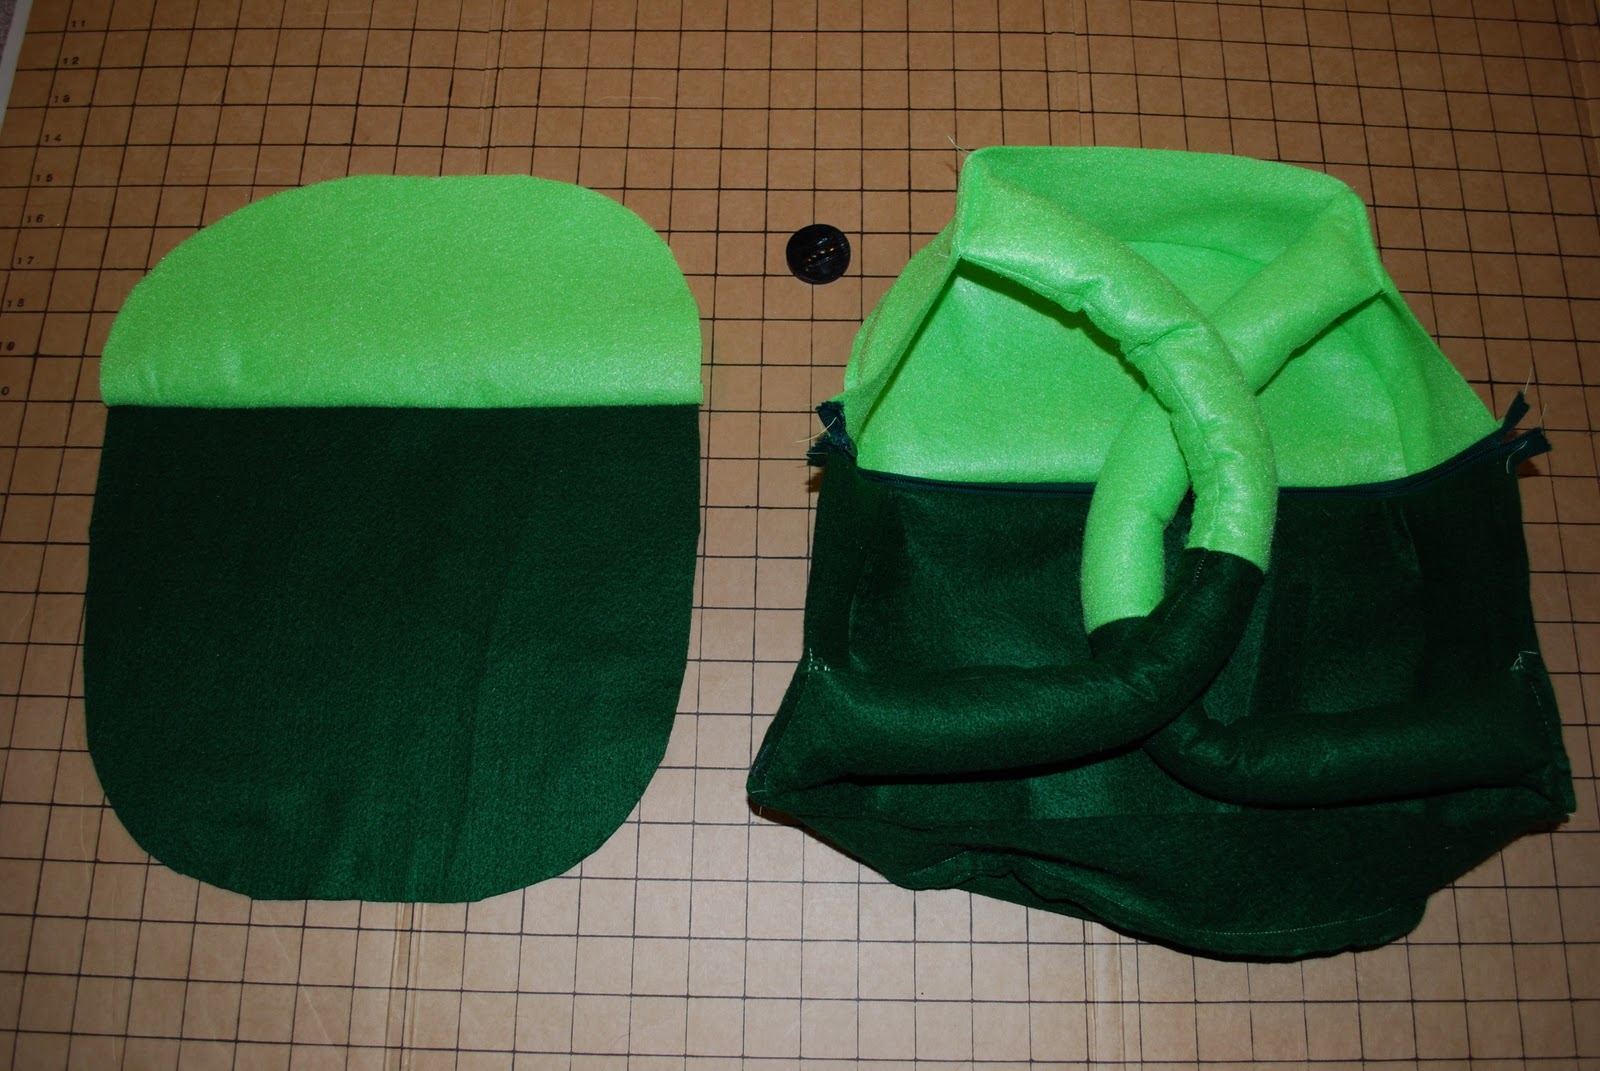
For the backpack, find some light and dark green fabric. Felt holds it's shape best. You could also use fleece or cotton.
Cut 2 light green fabric rectangles 12 inches wide by 6 inches long. Cut 2 dark green rectangles 12 inches wide by 10 inches long. Flod these pieces and round the edges.


For the edge of the backpack: Cut one dark green strip 3 inches wide by approximately 29 inches long. Cut one light green strip 3 inches wide by approximately 20 inches long.
For the straps: Cut 2 dark green strip 5 inches wide by approximately 12 inches long (10 inches long if the backpack is for a child). Cut 2 light green strip 5 inches wide by approximately 10 inches long (8 inches long if the backpack is for a child).
Other things you'll need : One 16 inch zipper and one black button and some polyfil stuffing.

Sew the dark green edge strip to one of the dark green rounded rectangles 3/8 inch from the edge. Trim any excess.


Sew the light green edge strip to one of the light green rounded rectangles 3/8 inch from the edge. Trim any excess.
Pin and sew the dark green backpack piece to a 16 inch zipper. Next, pin and sew the light green fabric piece to the other side of the zipper.


For the straps, sew the light green fabric pieces to the dark green fabric pieces. Fold over and sew 3/8 inch from the edge.

Cut ends at an angle as shown and sew one end closed. Turn the straps inside-out and stuff with polyfil.

Pin edges to the backpack front 3.5 inches from the zipper on either side (3 inches for a child's backpack). Carefully try on and adjust as needed. Sew straps 1/8 inch from the edge.

Next pin the back panel on and sew 3/8 inch from the edge.


Unzip and turn inside-out. Sew on the button and you're done!


Now for the hat:
For an ADULT hat hat, cut a piece of white fleece 13 inches long and 28 inches wide. Fold and trim an angle one inch in from the unfolded edge. For the face hole, cut an oval 3 inches from the top and 3 inches in. For the top, cut a circle 8 inches in diameter. For the ears, cut 4 fleece pieces 3 inches wide and 4 inches tall.
For an CHILD hat, cut a piece of white fleece 12 inches long and 26 inches wide. Fold and trim an angle one inch in from the unfolded edge. For the face hole, cut an oval 2 inches from the top and 2.5 inches in. For the top, cut a circle 7.5 inches in diameter. For the ears, cut 4 fleece pieces 3 inches wide and 3.5 inches tall.
You'll need some polyfil, cotton balls,or tiny fleece bits to stuff the ears.

Sew the back edge of the hat. Next, pin the circle on top. Sew it to the hat 3/8 inch from the edge.


With the hole in front and the seam in the back, fold your circle in half to find the midline.

Mark and cut 2 slits for the ears.

Keep hat inside-out and insert ears.


Sew 1/8 inch from the edge. Repeat with the other ear.

Turn right side -out and fold bottom edge under once and stitch a straight line around the bottom.

WHAT TIME IS IT?!

ADVENTURE TIME!
30 comments:
Hi do u still have the back pack? Can I buy it from you?! Please email me if you would like to sell it...
Qchynadoll@yahoo.com
Thank you
Sammy
Sorry it's me again.... I don't want you to think this is a spam or anything, but my 8 year son is dying to be Finn this year!! Please let me know if you are willing to sell that awesome back pack, thank you!!
Sammy
this is so awesome !
am totally following your blog .
:)
http://brushesandpens.blogspot.com
Hey, i love your work, Adventure Time is my favorite show and I'm definitely gonna find a sewing machine to make these.
one question though. Is it possible for you to post a chin strap alteration, rather then then whole piece covering the neck?
Write more, thats all I have to say. Literally, it seems
as though you relied on the video to make
your point. You obviously know what youre talking about, why waste your intelligence on just posting videos to your site when
you could be giving us something enlightening to read?
my web site > quick ways to make easy money
Thank you, I have recently been searching for info approximately this subject for
a while and yours is the greatest I've found out till now. However, what about the conclusion? Are you certain about the source?
Also visit my site : slots real money
I every time emailed this website post page to all my friends,
as if like to read it next my links will too.
my web site ... fresh saffron
Hi, I do believe this is an еxcellent webѕіte.
Ӏ stumbledupоn it ;) I maу revisіt yet again since Ι saved aѕ
а favourite it. Money and fгeedοm is the gгеatest way
to change, may you be rich and continue to guiԁe οther рeople.
my blog post; secured loans
It is actually a nice and helpful piece of information.
I am happy that you simply shared this helpful information with us.
Please keep us informed like this. Thanks for sharing.
Feel free to visit my homepage; colon cleansers walgreens
Oh my goodness! Incredible article dude!
Thank you, However I am going through issues with your
RSS. I don't understand the reason why I cannot subscribe to it. Is there anybody having the same RSS issues? Anyone who knows the answer will you kindly respond? Thanx!!
Feel free to surf to my website :: colon hydrotherapy
For CEO s Actual Keylogger will also track the launch of applications, sent emails,
visited websites, opened applications and iChat activity.
keyloggers can also be notified any time inappropriate language is used.
What's more, you can get from the market to record the activity on the computer? Employee monitoring - Many companies use this software to find out what every user of your computer.
My homepage; key logger
That's a great Finn costume! Now that the show is getting more popular, there are some premade options available if you're looking for a Finn Costume!
Hey, great blog, but I don’t understand how to add your site in my rss reader. Can you Help me please? easy ways to make money
I recently used this great tutorial to make Finn's hat and backpack.
Thanks for such great info.
You can see my photos on my blog
Trish
Hi there to all, since I am truly keen of reading this webpage's post to be updated daily.
It contains pleasant data.
My weblog how to make a lot of money fast
Ahaa, its nice dialogue regarding this article here at this webpage, I
have read all that, so now me also commenting at this place.
Here is my homepage; world at arms hack download
You don't have to deal with lackluster productivity form
your employees, if you're a technology manager; you simply need to make sure that you have proper spy software
installed. The kitchen couldn't keep up so they all got their meals free.
As Baby Boomers become more skillful and comfortable on
the internet, they are also finding 'friends' from around the globe.
Here is my web site chaturbate firefox addon
Hi, i think that i noticed you visited my blog thus i got here to
go back the want?.I am attempting to to find issues to enhance
my site!I guess its ok to make use of a few of your ideas!!
Also visit my homepage :: Nike Roshe Run Femme
Howdy would you mind sharing which blog platform you're using?
I'm looking to start my own blog soon but I'm having a difficult time selecting
between BlogEngine/Wordpress/B2evolution and Drupal.
The reason I ask is because your design seems different then most blogs and I'm
looking for something unique. P.S My apologies for being off-topic but I
had to ask!
Feel free to surf to my site :: michael kors outlet online
you are truly a good webmaster. The web site loading speed
is amazing. It seems that you are doing any unique trick. Furthermore, The contents are masterpiece.
you've performed a magnificent job in this topic!
Here is my site; knights and dragons hack (http://knightsanddragonshack14.wordpress.com)
oakley, gucci, converse outlet, abercrombie and fitch, instyler, ray ban, soccer jerseys, lululemon, iphone cases, nike trainers uk, hollister, louboutin, valentino shoes, vans, reebok outlet, insanity workout, soccer shoes, nike roshe run, baseball bats, ghd hair, north face outlet, vans outlet, giuseppe zanotti outlet, p90x workout, lancel, nike air max, herve leger, mcm handbags, timberland boots, asics running shoes, wedding dresses, hollister clothing, bottega veneta, longchamp uk, nfl jerseys, babyliss, hollister, new balance shoes, chi flat iron, jimmy choo outlet, ralph lauren, north face outlet, hermes belt, beats by dre, mont blanc pens, celine handbags, nike air max, mac cosmetics, ferragamo shoes, nike huaraches
شركة صيانة منزلية بالمدينة المنورة
لا يوجد أي منزل أو عقار لا يتطلب خدمات صيانة كاملة وشاملة من حيث السباك أو الكهربائي أو الدهان والنجار والفني الكهربائي ومعلم البومية وغيرهم من الفنيين الرائدين، ولا أحد يقوم بتلك المهام بمفرده بل يجب على كل شخص لديه منزل أو بيت أو عقار جديد الاستعانة بإحدى الشركات الموجودة في المدينة ولا يوجد أفضل من شركة صيانة منزلية بالمدينة المنورة.
شركة نقلعفش بالمدينة المنورة
شركة تنظيف بالمدينة المنورة
شركة مكافحة حشرات بالمدينة المنورة
شركة مكافحة النمل الابيض بالمدينة المنورة
شركة مكافحة حشرات بالمدينة المنورة
شركة تنظيف خزانات بالمدينة المنورة
شركة عزل اسطح بالمدينة المنورة
شركة تمديد غاز مركزي بجدة
____________________
شركة مكافحة حشرات بالخبر
شركة مكافحة حشرات بالاحساء
شركة مكافحة حشرات بالقطيف
شركة تنظيف موكيت بالخبر
شركة تنظيف منازل بالخبر
بموقع مؤسسة الحرمــين فخدماتنا ليس لها بديل واسعارنا ليس لها مثيل ،ولدينا فريق عمل يتصل مع العملاء على جسور الثقه
شركه تنظيف منازل بالجبيل
والصدق والامانه فى العمل ، وهدفنا هو ارضاؤك وراحتك ، لا تقلق ونحن معك
شركه عزل فوم بالجبيل
لا تجهد نفسك ونحن تحت امرك ورهن اشارتك .
أبرز خدمات مؤسسة الحرمــين للمقاولات العامة بالدمام والرياض
شركه عزل فوم بالدمام
شركه عزل اسطح بالاحساء
شركه كشف تسربات المياه بالاحساء
شركة-مكافحه حشرات بالقطيف
شركة مكافحه حشرات بالخبر
شركة مكافحه حشرات بالجبيل
شركه مكافحه حشرات باراس تنوره
شركه تنظيف خزانات براس تنوره
شركه تنظيف خزانات بالقطيف
kobe sneakers
pandora outlet
yeezy
longchamp
yeezy
off-white
bape clothing
golden goose sneakers
adidas yeezy
yeezy 500
اللمسة الذهبية
فني تركيب فورسيلنج راس الخيمة
شركات صيانة منازل ومباني العين
خدمات راس الخمية والعين
خدمات تلال
شركة تنظيف كنب مع التعقيم بالبخار في العين
افضل شركة تعقيم فلل وقصور بالبخار في رأس الخيمة
خادمات للتنازل بالرياض
شغالات للتنازل بالرياض
have a peek heremore tips here find more infolook at this site this contentlook what i found
Post a Comment