Sunday, April 29, 2012

Kokoleo Custom Acklay

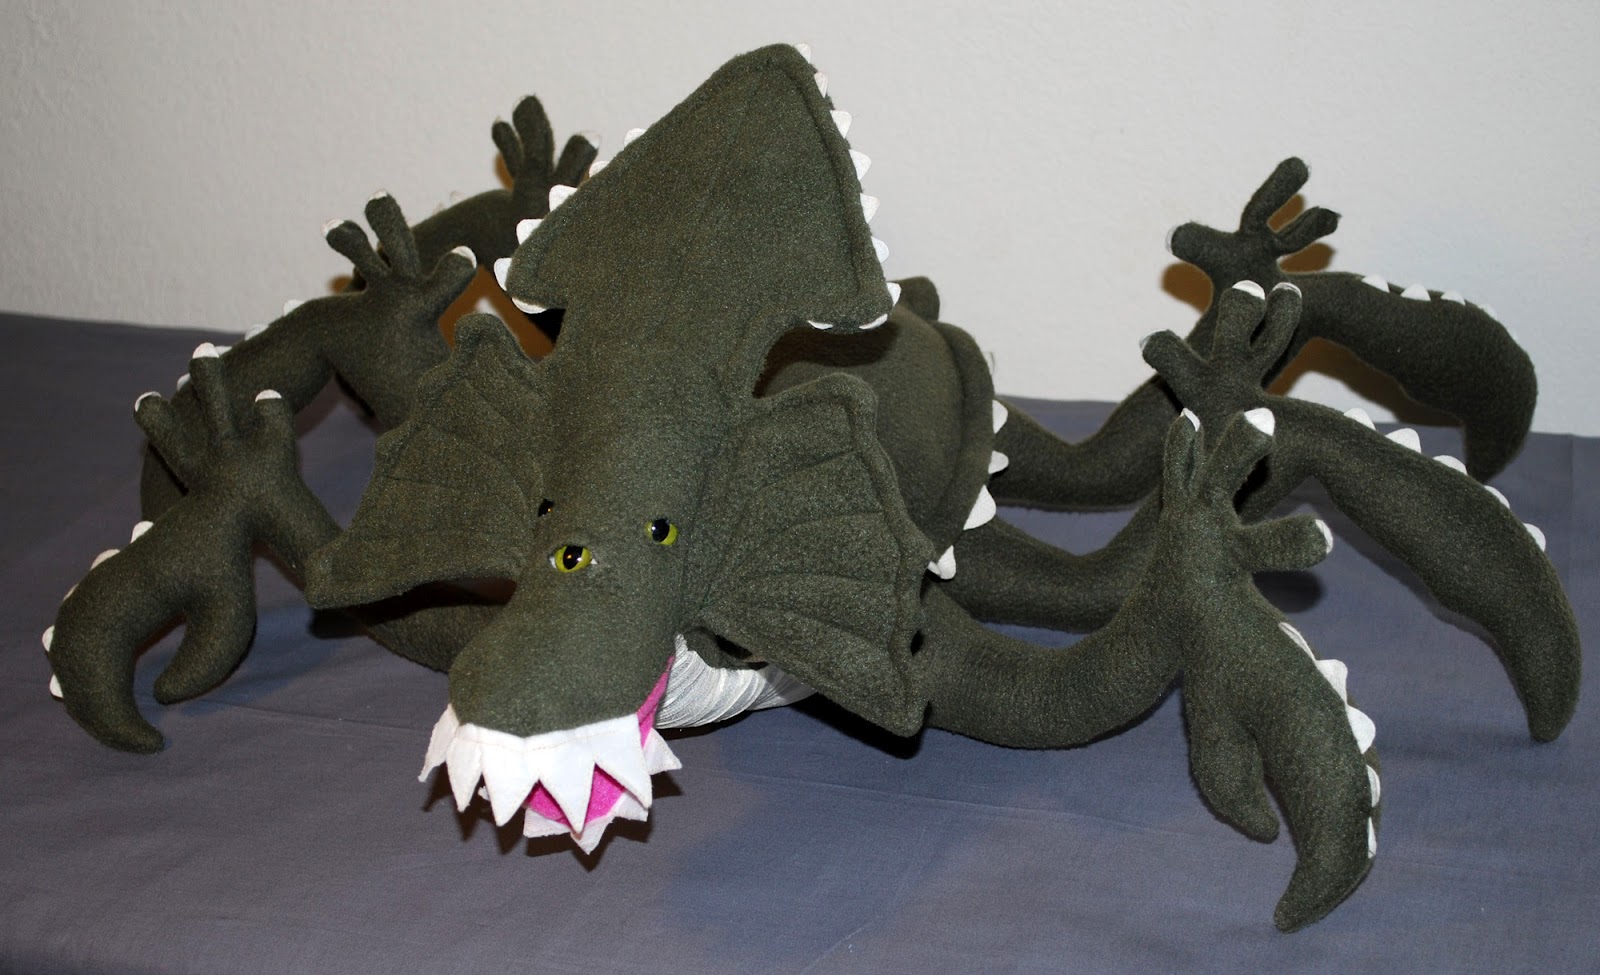
Here's my latest custom plush creation: An Acklay from Star Wars.


Now, before you think I must be the biggest Star Wars fangirl ever for undertaking such a complex project, I have to admit that before last month I had never even heard of an Acklay. A woman who had seen some of my other custom plush creatures that I had made from kids' drawings wrote to me to ask if I would make an Acklay for her son, a Star Wars fan who for years has been asking for a stuffed Acklay. She had looked for one but unfortunately they don't exist. Normally I don't accept requests to recreate licensed characters (I get these requests often) but this time I made an exception and accepted the challenge.

 I started by Googling images of Acklays and based my plush on these pictures:


 And referred to them often as I pieced together the creature. Here are the arms:


It's the only picture I took in while I was making it. 

  The Star Wars Wiki, WOOKIEPEDIA, describes and Acklay as "a three-eyed amphibious non-sentient crustacean native to Vendaxa. Though acklays lived underwater, they could go on land to hunt, which they frequently did, as the lemnai, a creature that lived on the plains of Vendaxa, was their main source of food...

As they resided in the oceans of Vendaxa, their eyes enabled them to see in darkness, although they were near-sighted...


Despite their crustacean-like nature, acklays also had characteristics possessed by reptiles, such as their powerful jaws filled with sharp teeth...


The acklay had a tough, leathery skin that ranged in color from green to brown, another trait from its reptilian heritage...
 

Its belly was more vulnerable than other parts of its body, as the flesh covering it was not as tough as it was elsewhere...


 Acklays had a bony crest around their neck, used for both intimidation and protection."


They did not, however, have kokoleo labels on the backs of their necks, but this one does.


Now go, weird creature, to the boy who wants you. May the force be with you.


Wednesday, April 18, 2012

Hamster Crafts!

Meet the newest member of our family - Goomba!


He's super cute and tons of fun and looks right at home in the Woodsey House.  He also fits right in to this vintage Kenner Family Tree Tots Tree House:


But his favorite place is snuggled in a pocket.


McKenna carries him around in this fleece bag I made, which we now call the Hamster Holder.


I had originally intended it to be a project for my "No Sew Pillows and Totes" craft class last week, but realized it was a little too difficult for the younger kids in my class so I scrapped the idea and gave it to McKenna instead. Goomba loves to snuggle up and sleep in it.


Look how adorable he is!


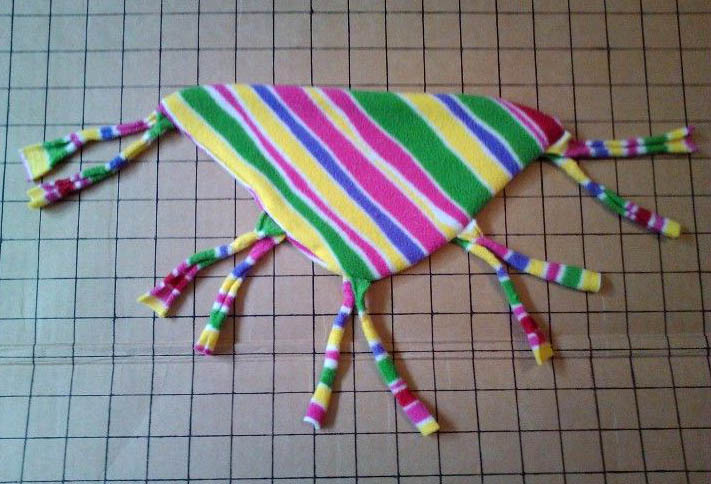
I made another Hamster Holder today. It only takes aboout 10 minutes. Here's the pattern:


Take 2 pieces of fleece, cut in a circular shape with a flat top. Then all around the edge (except at the top) make 2 inch cuts, about a finger's width apart. Also, cut a long strip of fleece for the strap. Next, tie each fringe bit together with 2 knots all the way around and then tie your strap to the top knots. Viola!


 You've got a hands-free Hamster Holder.


Yesterday I saw a project on Craft Magazine for a Pocket Fleece Pet Hammock posted on Craft Nectar, so I immediately went in my studio and made this for Goomba:


I made it a bit differently though,  in a triangular shape with fleece strip ties instead of grommets and hooks.


I may just abandon all my other kokoleo products and become a full-time hamster-crafter. Okay, maybe not. But this little guy has been a sweet source of inspiration lately. He's even with me right now, hanging around my neck helping me write this blog post.


Awwww....

Monday, April 16, 2012

Kokoleo Windows and Craft Camp

Well it seems I failed in that  that resolution to blog at least 10 times a month. I promise to better this month though. Oh wait, this month is already half over. Where does the time go?

Last month I spent a lot of my time preparing for this:


An all-kokoleo display in the windows of happy delusions in downtown Renton. That's the inside view, here it is from the outside:


I said windows plural because directly across from this is another huge window that I decorated as well:


And in the middle is another big window.


It was fun filling these spaces with my stuff. Mary, the owner of happy delusions, gave me free reign to do what I want with them. On the day I decorated them, McKenna didn't have preschool and I worried she would get restless but she was an awesome helper – handing me nails, clothes pins, and glue dots. She said, “Some day I'm going to work here. I'm going to sew things and sell them here like you do.” Since I technically don't have a real job, it was as close as a “Take Your Daughter to Work” day as I'll get.

The following night was "First Friday," a downtown art walk where some of the businesses stay open late and the community comes together to enjoy wine and cookies and art. My friend Dacia, who owns the Old Renton Book Exchange came and purchased this shirt for her boy Bo off my clothesline display. How cute is this kid?


To kick off my Spring Break Kids Craft Camp that I was going to be teaching at the store the following week, I offered to set up a table in front of the shop and let people make some of the projects I have planned for my class. 


The results were adorable. Here are just a few:


And here are some pics of last week's Craft Camp. Monday was Fun with Puppets:


Tuesday was Monster Mania:


Wednesday was Puffball Power:


Thursday was No-Sew Pillows and Totes:


And Friday was Arty Party:


Turnout was great and we're even thinking about doing it again this summer and possibly next winter break as well. Stay tuned!

Sunday, March 11, 2012

Raggedy Barbie

Yesterday, inspired by a call for submissions for an Altered Barbie art show at happy delusions, I spent a rainy Seattle afternoon holed up in my studio making this:


I call it Raggedy Barbie.

I printed the face onto photo transfer paper, ironed it onto canvas material and using McKenna's Raggedy Ann doll as a reference, cut out all the body parts like this:


 Then stuffed it, sewed on yarn hair, and made a patchwork print dress and ribbon belt.


Here's a close-up. 

I probably spent over 6 hours making it. Minus the Barbie face, it looks a lot like a rag doll I had when I was little - her name was Minneapolis and she had yellow yarn hair and a patchwork dress. In college, I made several rag doll-related works of art including a 3-dimensional fabric collage atop an antique quilt titled Annabelle Lives in A Patchwork World. It was a girl (composed of my clothes) with yellow yarn hair leaning against a fabric tree. I also made a painting of Raggedy Anne all grown up and stuck in a toy box.


 It hangs in McKenna's room now. I suppose rag dolls are a theme for me, which is why when I thought about how to alter Barbie I instantly thought of making a her into a traditional rag doll. Barbies are usually sexy and stylish. Rag dolls? Not so much. The juxtaposition of the two is a wee bit off-putting. When I was nearly finished making it McKenna walked in, looked at it, screamed! and said, "That's a creepy doll mom!"


 Ha! She warmed up to her though.


And now they're friends.

Wednesday, February 29, 2012

Shroom Decor

  Look what I grew in my studio:


A couple of plush mushrooms. They're currently transplanted downtown at Happy Delusions but I can grow more. I'm going to try a few more color combos and offer some custom plush shrooms on Etsy soon. Try saying some custom plush shrooms 10 times fast. It's hard!

Tuesday, February 28, 2012

Crazy Cat Lady Craft - A Fish Tank Litter Box

When we remodeled our bathroom last summer we got our cat Bella a new litter box to match the decor. Unfortunately, she refused to go in it because the rigid plastic door slammed behind her and freaked her out. So for the last 10 months we've had it doorless. I was getting tired of looking at her smelly clumps so I decided to turn it into a fish tank.


 Well, not a real fish tank. That's actually part of a vinyl shower curtain we had in our bathroom years ago. I loved the print so I kept in my fabric stash for years.


I simply cut out a small piece the size of the cat door and duct taped it to the inside top of her litter box. It's thin enough for her to easily push through and it doesn't slam behind her, plus it gives her some privacy and gives us something nicer to look at than clumpy cat poop.

 I was a bit worried she might not like it...


 But after a little investigating,


she gave me her approval by stepping inside and scratching around. Fish don't intimidate this kitty!


LinkWithin

Related Posts Plugin for WordPress, Blogger...